Showing posts with label chocolate. Show all posts

Tuesday, February 14, 2012

Whoopie Pies (Whoopie!)


Whoopie pies, just in time for Valentine's Day.

If you are one of those people who insist on calling Valentine's Day "Singles Awareness," you might want to stop reading about now. You see, I am not one of those people. Honestly, I've only had a significant other for one V-Day in my life and he was out of town for it, so it's not that I am one of those lucky-in-love girls who likes the day because she gets gifts.

I just like Valentine's Day. I am single. And I like Valentine's Day. I mean. Of course, the day really should be called "National Chocolate and All Things Decadent Day." And anyone can take part in enjoying a good piece of chocolate some buttery lobster or whatever your fancy is. 

Also, a specific day to take the time to show your loved one how you feel isn't all that bad anyway. Yes, I know, you should do that every day, but it's kind of nice to have a holiday for it. I mean, we should celebrate Christ's birth 365 days a year too, but Christmas is a good time to slow down and really take the moment in. Same goes for V-day, whether you have met your significant other already or are still waiting.

As for me, my Valentine's Day evening is being spent at church with a 20 or so wonderful people for whom I am cooking dinner (honey curry chicken, brûléed sweet potatoes, broccoli, and chocolate covered strawberries for dessert). Fun, food, and fellowship with people I love, who could ask for more?

While you are appreciating the people who have been placed in your life, take some time to make and enjoy some whoopie pies, k?


I love minis, I can fit over 30 on one sheet.


Mmmm, all baked and ready to sandwich with frosting.

Whoopie pie filling is so addictive.


Testing my first whoopie while taking pictres, yum.


Cakes
  • ½ cup butter
  • 1 cup brown sugar, packed
  • 1 teaspoon espresso powder, optional
  • 1 teaspoon baking powder
  • ½ teaspoon baking soda
  • ¾ teaspoon salt
  • 1 teaspoon vanilla extract
  • 1 large egg
  • ½ cup Dutch-process cocoa
  • 2 ⅓ cups King Arthur Unbleached All-Purpose Flour
  • 1 cup milk

Filling
  • ½ cup milk
  • 2 ½ tablespoons all-purpose flour
  • ½ cup shortening
  • ½ cup white sugar
  • ½ teaspoon salt
  • 1 tablespoon vanilla extract

Preheat the oven to 350°F. Lightly grease (or line with parchment) two baking sheets.
To make the cakes: In a large mixing bowl, beat together the butter, sugar, espresso powder, baking powder, baking soda, salt, and vanilla till smooth. Add the egg, again beating till smooth.
Add the cocoa, stirring to combine.
Add the flour to the batter alternately with the milk, beating till smooth. Scrape down the sides and bottom of the bowl, and beat again briefly to soften and combine any chunky scrapings.
Drop the dough by ½ a tablespoon onto the prepared baking sheets, leaving plenty of room between the cakes; they'll spread. 
Bake the cakes for 9-11 minutes, till they're set and firm to the touch. Remove them from the oven, and cool on the pans. While still lukewarm, use a spatula to separate them from the pan or parchment; then allow to cool completely.

To make the filling: In a medium saucepan, whisk together the ½ cup of milk and 2 ½ tablespoons flour. Cook over medium-high heat, stirring frequently, until thick. Remove from heat set aside to cool. In a medium bowl, Beat together the shortening, ½ cup sugar, ½ teaspoon salt and 1 tablespoon vanilla. Stir in the cooked milk mixture and beat for an additional 20 minutes, until really fluffy. Sandwich filling between two cookies. 

A mixture of recipes from King Arthur (cakes) and allrecipes (filling)

Makes about 40-45 mini pies.

Friday, February 3, 2012

The Best Fudgy Banana Caramel Brownies (easily Veganized!)


Do you really want chocolate? Do you need so badly in your life that you might gnaw your pointer finger off despite its infinite usefulness is in daily life if that's what it took to get some of that bittersweet cocoa? If you answered yes, we totally think alike. Which is why I am supplying you with this recipe. I love your pointer finger that much. 

The best part is, you can almost tell yourself that these brownies are good for you! I mean, they have whole wheat flour in them and there is no butter or oil in sight. In fact, they even have fruit (apples and bananas, so classic) in them! The sugar content can totally be ignored for these purposes. Enjoy your almost-good-for-you brownie and sit back on the couch instead of going to the gym.

Also, these are fantastic if you have vegan are dairy-free friends. If you don't want to mess with finding dairy-free caramel (though you will need to mess with finding vegan chocolate chips), simply skip that that step and, instead, heat up some regular JIF or Peter Pan peanut butter and drizzle over top as soon as they come out of the oven. Mmmm, chocolate+PB+banana. Yum. In my case though, I think I prefer the pools of gooey caramel that form on the top of these beauties. Caramel+chocolate+banana, delicious.


Applesauce Brownies (with option to make vegan)Adapted from The Messie Kitchen
Yield: 8x8 pan (8-12 servings, depending on how big or small you like your brownies) 

1 cup unsweetened applesauce* omit sugar if using sweetened
1/3 cup sugar* omit if using sweetened applesauce
1 teaspoon vanilla
1/4 cup unbleached white flour
½ cup whole wheat flour
1/3 cup cocoa powder
2 teaspoons baking powder
1/2 teaspoon baking soda
1/4 teaspoon salt
2/3 cup chocolate chips *use dairy free chips if veganizing
1 large banana (yellow, not brown or super squishy)
¼ cup caramel sauce of your choice *use a dairy free brand if veganizing

1.Preheat oven to 350 and lightly spray or oil an 8 x 8 baking pan.
2. Mix applesauce, sugar (if using unsweetened applesauce), and vanilla in a medium bowl. In another bowl, whisk flour, cocoa, baking powder, baking soda, and salt together.
3. Make a well in the center of the dry ingredients and add the applesauce mixture. Mix until just combined. Gently fold in chocolate chips
4. Spread half of batter the prepared pan (will be fairly thin). 
5. Slice the large banana into coins and place evenly on top of batter in pan (it should look like polka dots or a connect four game almost). 
6. Spread the remaining half of the batter over top of the bananas.
7. Drizzle caramel sauce over top (I made rows going across up and down so that it pooled where the rows met). 
8. Bake 25-30 min, until center is firm and not sticky. Cool completely before slicing and try not to eat it all before your roommate/family comes home.


Thursday, January 26, 2012

Red Wine Chocolate Cake. Eat this!


Oh. My. Gosh. I will never waste a drop of red wine again. I swear. This cake is so good, please stop what you are doing and make it. Now. You will not regret it. The only reason someone would be mad at your for leaving work early is that you ate all of this without sharing.

This cake is moist and the flavor of the wine is pronounced, but blends perfectly with the cocoa. Although it has sugar, it is not overly sweet and you can sense the bitter taste of the cocoa. I tried two recipes for red wine chocolate cakes and this one is the definite winner. I will be making this as soon as I have another bottle of red wine to use up -that shouldn't take long, as I am a light weight and can only drink 1/2 or 1 glass of wine in an evening.

Seriously, the combination of red wine+chocolate almost rivals my love for peanut butter+chocolate+banana. This is dangerous.


Red Wine Chocolate Bundt Cake
Unashamedly taken from Food and Wine

2 cups all-purpose flour
3/4 cup natural unsweetened cocoa powder (not Dutch process)
1 1/4 teaspoons baking soda
1/2 teaspoon salt
2 sticks unsalted butter, softened (1 cup)
1 3/4 cups sugar
2 large eggs
1 teaspoon vanilla extract
1 1/4 cups red wine
Confectioner's sugar, for dusting
Whipped cream, for serving

Preheat oven to 350F. Butter and flour a 12-cup bundt pan (10 inch round). In a bowl, whisk the flour, cocoa, baking soda, and salt.

In a large bowl, using a mixer, beat the butter with the sugar at medium-high speed until fluffy (4 minutes). Add eggs one at a time, beating until incorporated after each one. Add the vanilla and beat 2 more minutes. Alternately fold in the dry ingredients and the wine in turns, until just incorporated.

Scrape the batter into the prepared pan, and bake for 45-55 minutes, until a toothpick inserted in the center comes out clean. Let the cake cool in the pan for 10 minutes, then turn it out on a rack; let cool completely. Dust the cake with confectioner's sugar and serve with whipped cream.

Friday, January 13, 2012

Boston Cream Pie


So this is the dessert I chose to serve for Christmas dinner this past year. Well, my mom asked for it and so I decided to go for it. Although the 3 components (cake, filling, glaze) took a bit more time than I usually put into a recipe, it was definitely worth it. Also, I made the custard 2 days ahead, the cake the day before, and then did the glaze and assembly the morning of. Choosing to do the work over the course of a few days made it seem much less time-consuming.

Sitting here in 18F degree weather under my big feather blanket, wearing a hoodie and sweats and a hat, really makes me wish I was back in 86F degree Florida (where I was on Christmas when I ate this delicious dessert.) This is a great way to end a special dinner and is generally impressive, especially when you tell your guests that it was made entirely from scratch.


Boston Cream Pie

Custard

  • 2 cups milk
  • ¼ cup white sugar
  • 2 egg yolks
  • 1 egg
  • ¼ cup cornstarch
  • ⅓ cup white sugar
  • 2 tablespoons butter
  • 1 teaspoon vanilla extract
In a heavy saucepan, stir together the milk and ¼ cup of sugar. Bring to a boil over medium heat.
In a medium bowl, whisk together the egg yolks and egg. Stir together the remaining sugar and cornstarch; then stir them into the egg until smooth. When the milk comes to a boil, drizzle it into the bowl in a thin stream while mixing so that you do not cook the eggs. Return the mixture to the saucepan, and slowly bring to a boil, stirring constantly so the eggs don' t curdle or scorch on the bottom.
When the mixture comes to a boil and thickens, remove from the heat. Stir in the butter and vanilla, mixing until the butter is completely blended in. Pour into a heat-proof container and place a piece of plastic wrap directly on the surface to prevent a skin from forming. Refrigerate until chilled before using.

Cake (from Bakerella)
  • 1 cup (2 sticks) of butter (room temperature)
  • 2 cups of sugar
  • 4 eggs (room temperature)
  • 3 cups of sifted self-rising flour (or make some yourself)
  • 1 cup of whole milk (room temperature)
  • 1 teaspoon pure vanilla extract 
  • ½ teaspoon butter flavoring (in the extract section)
Preheat oven to 350 degrees and grease and flour (2) 8 inch cake pans, then prepare about 10 cupcake tins with paper or foil liners because there will be extra batter, or just prepare a 3rd 8 inch cake pan for the extra batter. Have fun with the cupcakes, feel free to make mini boston cream pies like I did.
Using a mixer, cream butter until fluffy. Add sugar and continue to cream for about 7 minutes. Add eggs one at a time. Beat well after each egg is added.

Add flour and milk (alternating to creamed mixture), beginning and ending with flour.
Add vanilla and butter flavoring to mix; until just mixed. Divide batter equally into two, filling about 1/2 full cake pans, then fill whatever you want (extra cake pan, cupcake tins) with the extra batter. Bake and do with the extra batter however/whatever you desire.

Hold each cake pan about 3 inches above your counter and carefully drop the pans flat onto counter several times to ensure release of any air bubbles. This will help you have a more level cake.
Bake for 25 – 30 minutes (depending on your oven) until done.
Cool in pans for 5 – 10 minutes. Remove and immediately wrap each layer in plastic wrap to seal in moisture. Cool completely on wire racks. I place my cake layers in the freezer to make for easier cutting/leveling.
Glaze *Do not make until custard has chilled and cake layers are cooled/frozen and ready to be assembled, because the pie must be assembled immediately upon making the glaze.

  • 1 1/4 cup semisweet chocolate chip
  • 6 tablespoons butter
  • 2 tablespoons light corn syrup
  • 1/2 teaspoon vanilla extract
In a double boiler over hot, but not boiling water, combine chocolate chips, butter, and corn syrup. Stir until chips are melted and mixture is smooth, then add vanilla.

Assembly

Unwrap plastic wrap from your two cake layers. Place cake layers on a smooth service (I put them on a piece of parchment or wax paper on my counter) with the rounded side up. With the tool of your choice (I use a large serrated bread knife), slice the rounded portion off so that both sides are now completely level. Do this to both cake layers.

Place one of the layers on a cake stand that has a piece of parchment or wax paper cut to the size of the stand, then take custard and heap a generous portion onto the middle of what is now the bottom cake layer. Spread custard out to the sides, making sure to keep the amount of custard equal across the cake -mine was about 1/2 inch thick; you will not use all of the custard, so save the rest for a later use or for mini cream pies if you made cupcakes . Gently place second cake layer on top of custard layer.

*Now you can make the glaze*

Spread warm glaze over top of cake, letting it drizzle down the sides, being sure to cover the entire cake. This is why you cut a piece of paper to go underneath the cake, so that it catches the drips. There will be a little leftover, so feel free to use for the mini cream pies, or for dipping fresh fruit, pretzels, marshmallows or whatever else you on hand.

Chill in the fridge until glaze hardens (an hour or so?). I left mine in the fridge for a few hours while we prepared Christmas dinner.

Enjoy!
My ugly, but oh-so-yummy and personal-size mini Boston Cream Pies
made from the leftover batter that I put in cupcake tins. 

Saturday, December 17, 2011

Chocolate Peppermint Cookies... How Christmas Tastes


Girls in white dresses with blue satin sashes, snowflakes that stay on my nose and eyelashes, beautiful morning runs in Kentucky these are a few of my favorite things.

Honestly, I am a little slap happy while writing this (can't you tell from the above attempt at a song?). It's 3am and I am up because something woke me at exactly the 4 hour mark in my sleep cycle, that small window in which, if I am woken up, I cannot get back to sleep.

Just a fair warning, I can be a jerk 4 hours into my sleep cycle. Deal with it. (note: I love you, J!)

Actually, instead of dealing with it, you should make these cookies, because they could even make a very-grumpy-me content enough to stop complaining about lack of sleep...maybe. Oh well. I am off to go try something ridiculous in my kitchen (I will tell you about it later) at 3am and then to spin class at 5:30am in an attempt to not waste this early morning. Wish me luck.


Chocolate Peppermint Cookies
1 ¼ c butter, softened
2 c sugar
2 eggs
10 oz bag Andes Peppermint Crunch baking chips*, divided
(*I had a hard time finding these, so I used the candy cane Hershey's Kisses and chopped them up instead, but the baking chips are less work, if you can find them)
¾ c unsweetened cocoa
1 tsp baking soda
½ tsp salt
2 c flour

Cream butter and sugar. Add eggs and blend well. Combine cocoa, baking soda, salt and flour; then blend into creamed mixture. Add peppermint baking chips, reserving ⅓ c. Drop by teaspoonfuls onto greased cookie sheet. This is a wet, sticky dough. Top with a few reserved baking chips.
Bake at 350 degrees for 8-9 minutes. Do not over-bake. Cookies will be soft. They will puff during baking, but flatten a little upon cooling. Cool on cookie sheet until set, about 3 minutes; remove to wire rack to cool completely. Makes 4-5 dozen.

Wednesday, December 14, 2011

Kentucky Bourbon Balls


Christmas parties everywhere, every night. That's what December is for. Of Course, one should never show up to a party empty-handed, so here's a fun treat you can take with you next time you go to a holiday shindig. The glossy finish on the balls makes them a real treat that you can be proud of. They are a little labor intensive, but drag a friend into the kitchen and put on some dancing music and you will never notice.

Also, please please please keep these pure and use real Kentucky bourbon. I personally used Four Roses, but there are quite a number of good distilleries from Kentucky to choose from. These are not terribly strong, so you won't get tipsy off of them, but you can definitely taste the bourbon. This recipe is classic and definitely not that rum ball recipe that you find everywhere else. I personally much prefer these with their sweet, white insides.

Kentucky Bourbon Balls
From Beyond the Fence (a Kentucky cookbook)

1/2 cup chopped pecans
1/4 cup bourbon
6 tablespoons butter, melted
5 cups powdered sugar, sifted
6 ounces semi-sweet chocolate chips
1/2 block paraffin wax, shaved
Whole pecans, 1 to top each bourbon ball with

Spread chopped nuts in a shallow bowl and pour bourbon over nuts. Let soak overnight. The following day, in a separate bowl, combine butter, 4 cups sugar, and soaked nuts Mix thoroughly until mixture is consistent. Add remaining 1 cup sugar and mix well by hand. Using 1 tablespoon scoop, evenly scoop balls, rolling each into a sphere in your hand. Lay rolled balls on wax paper. Chill balls for at least 10 minutes in the fridge. In the meantime, prepare chocolate by melting chocolate and wax in a double boiler. Stir until melted and consistent throughout. Dip each ball into chocolate with a toothpick and allow excess chocolate to drip off before returning to wax paper. Place a pecan half on top of each ball before the chocolate hardens.

Should make 48 balls (I suggest to make them smaller than a tablespoon to get 48)

Tuesday, October 11, 2011

Raw, vegan, chocolate power bars!

As school really kicks into high gear, I find myself having less and less time to plan meals and eating more and more power/protein/snack bars. Combine my love for protein bars (ask my first college roommate, I had an entire dresser drawer devoted to them) with my food processor that I just found on craigslist, and you get lots of experiments with all sorts of [sometimes-whacko] grab-n-go bars. This particular recipe is from Enlightened Cooking and definitely wins my approval: easy and yummy.


Chocolate Power Bars
2 cups raw almonds (skins on)
1 pound pitted soft dates (two 8oz bags is usually how I find them)
2 tablespoons cocoa powder (not Dutch process) OR raw cacao powder (for strictly raw eaters)
1/4 cup raw wheat germ (toasted is fine if you are not strictly raw)
2 tablespoons ground flaxseeds (flaxseed meal)

Place almonds in a medium bowl. Fill bowl with cold water (preferably filtered, but tap is fine) to cover the almonds. Let the almonds soak for 3 to 4 hours. Drain the almonds and pat dry with a clean dish cloth.

Pulse almonds in food processor until finely ground. Add the dates and pulse until finely chopped and the mixture begins to resemble a thick "dough." Add the cocoa powder, wheat germ, and flaxseed meal. Process until blended.

Line an 8×8-inch baking dish with foil (seriously do this, it makes it so much easier to remove the bars). With clean, wet hands, press the bar mixture into the pan. Place in the freezer for at least an hour. Cut into 12 bars. Wrap each in plastic wrap and store in the refrigerator (though they need no refrigeration when packed in a lunch or gym bag).


Note: roughly 260 calories per bar, if you are curious.

Thursday, August 11, 2011

Oatmeal Layer Brownies

Does anyone else have an obsession with regional cook books? Specially Kentucky cook books? I only have three right now, but I can easily think of at least two more that I would love to have in my collection. Does Kentucky even have that much of a cuisine style to justify more than one book?

-Apparently it does, and I am the consumer that proves it. I love this latest one I acquired. It's called "Beyond the Fence: A Culinary View of Historic Lexington." Every one of its recipes that I have tried so far is just delicious. I especially love the recipe for peach pie (I might put it up here if I like the peaches at the farmers market this weekend). If you are looking for a good cook book and are in the Kentucky area, I definitely suggest this. You can find it at a number of places, including Joseph Beth and the Windy Corner Market.

The recipe for oatmeal brownies is not exactly what I think of as a "traditional brownie" because the chocolate is concentrated into a layer, instead of being mixed through out. But seriously, don't let that fool you. These seemingly oat-y bars will satisfy even the biggest choco-holics.

Look! I actually took an ingredients picture. Maybe, if you are really lucky, I might someday actually take pictures throughout the cooking/baking process like a "real" food blogger.


Oatmeal Layer Brownies
1 cup butter, softened
2 cups firmly packed light brown sugar
2 teaspoons vanilla extract
2 large eggs
3 cups old fashioned oatmeal
1 1/2 cups all-purpose flour
1 teaspoon baking soda
1 teaspoon salt
1 (12oz) package chocolate chips
1 cup sweetened condensed milk
2 tablespoons butter
2 teaspoons vanilla extract

Preheat oven to 350F. In a large bowl, cream butter and brown sugar until smooth. Add vanilla and eggs; beat well. Stir in oats. In a separate bowl, combine flour, baking soda and salt; stir until well mixed. Gradually add dry misture to butter mixture, stirring until well mixed. Spread 1/2 of mixture in a lightly greased 9x13 pan.

In a glass bowl, microwave chocolate chips, condensed milk and butter for 1 minute on high. Stir. If not smooth, microwave again on high for 30 seconds more and stir (repeat if needed). Stir in vanilla. Pour chocolate filling on top of oatmeal butter mixture in pan. Using a spoon or your fingers, crumble the remaining oatmeal mixture and dot/drop onto the top of the chocolate.

Bake 25-30 minutes until oatmeal mixture is beginning to brown on top. Cool completely and cut in 2x2 inch squares. Enjoy!

Monday, August 8, 2011

Mocha Panna Cotta


When I get a chocolate craving, I just have to follow it. This particular chocolate craving led me to make a mocha panna cotta.

I happened to have a lot of extra cream sitting around, as well as some gelatin left over from when I made marshmallows a few months ago, so I figured I would try it. I can't quite decide how to describe it... Somewhere between flan ans jell-o? Either way, I would definitely make it again, if for no other reason than that is is chocolate and "panna cotta" sounds fancy.

Mocha Panna Cotta
Asapted from Giada, Serves 2-3
  • ½ cup whole milk
  • 1 ½ teaspoons unflavored powdered gelatin
  • 1 ½ cups heavy cream
  • 2 teaspoons espresso powder
  • 2 teaspoons unsweetened cocoa powder
  • ¼ cup sugar
  • Pinch salt
  • Blocks of white and/or dark chocolate, optional
Place the milk in a heavy, small saucepan. Sprinkle the gelatin over and let stand for 5 minutes to soften the gelatin. Stir over medium heat just until the gelatin dissolves, but the milk does not boil, about 2 minutes. Add the cream, espresso and cocoa powders, sugar, and salt. Stir over low heat, until the sugar dissolves, about 3 more minutes. Remove from the heat and let cool slightly. Pour the cream mixture into 2 martini glasses (or whatever glasses you want to serve this in), dividing equally. Cover and refrigerate, stirring every 20 minutes during the first hour. Chill until set, at least 6 hours and up to 2 days.
When ready to serve, use a vegetable peeler on the chocolate blocks to create about 1 tablespoon each of the white and dark chocolate shavings. Sprinkle the shavings over each panna cotta and serve.

Tuesday, July 12, 2011

Dark Chocolate Cherry Smoothie


So good, so easy. And pretty dang good for you. Definitely try this for breakfast, a snack, or even dessert.

1/2 cup dark chocolate almond milk
1/2 cup of plain greek yogurt
3/4 cup of fresh cherries, pitted and stemmed

Place all ingredients in a blender for 30 seconds. Enjoy!

*Feel free to adjust the amounts of milk and yogurt, or even add ice, depending on what texture you prefer.

Sunday, July 10, 2011

Breakfast Crepes, yum.


These are the perfect breakfast to make on aSunday morning. Mix the batter together when you first get up, then sit and read the paper while you wait for the batter to set in the fridge. When you finish with the paper and your body's hunger has finally woken up, your crepes are ready for the pan and quickly find their way to your stomach =).
Whole Wheat Crepes
Adapted from Southern Living
3 large eggs
1 cup milk
1 tablespoon vegetable oil
1 cup whole wheat pastry flour
1/2 teaspoon salt
Yogurt and fresh fruit OR nutella and bananas for filling.

  • Beat first 3 ingredients at medium speed with an electric mixer until blended. Gradually add flour and salt, beating until smooth. Cover and chill 1 hour.
  • Coat bottom of a 7-inch nonstick skillet with melted butter; place skillet over medium heat until hot.
  • Pour 3 tablespoons batter into skillet; quickly tilt in all directions so batter covers bottom of skillet.
  • Cook 1 minute or until crêpe can be shaken loose from skillet. Turn crêpe over, and cook about 30 seconds. Place on a dish towel to cool. Repeat procedure with remaining batter. Stack crêpes between sheets of wax paper.
Place on serving tray, spoon yogurt or nutella onto crepe and top with fruit of choice, then roll/fold to your preference.


Saturday, July 9, 2011

Bread Pudding


So my this bread pudding was definitely my pre-run snack. Believe it or not, I actually was feeling quite good at the end of my 7 mile run through horse country. I was even rewarded with the sight of these beautiful horses at the end. Of course, I stopped in at the Windy Corner Market and got some mango peach sweet tea to help with my recovery (I really like sugar).

Anyway, here's a recipe for this deliciousness. Feel free to serve with vanilla icecream and any warm, sugary, rum-filled syrup concoction of your choice.

Also, if you cut the cream down to 1 cup, it comes out more like a baked french toast, which I highly recommend for breakfast (I accidentally did that to one my trials with this recipe.)9 large croissants

Bourbon Chocolate Bread Pudding
Adapted from Southern Living
  • 9 large croissants
  • ⅓ cup bourbon
  • 1 ½ cups golden chocolate chips (go up to 2 if you really want a lot of chocolate)
  • 8 large eggs
  • 1 ½ cups sugar
  • 3 cups heavy cream
  • 2 tablespoons vanilla extract
  • ⅛ teaspoon salt
    Slice croissants in half lengthwise; tear bottom halves of croissants into small pieces. Layer croissant pieces evenly in a lightly greased 13- x 9-inch baking dish. Sprinkle with chocolate chips. Place croissant tops, crust sides up, on top of chocolate chips.

    Whisk together eggs and sugar. Whisk in bourbon, cream, vanilla, and salt. Slowly pour mixture over croissant tops (may want to do a bit at a time, allowing time for it to soak in); press bread to absorb liquid. Cover; chill 1 hour.

    Place dish into a larger pan. Pour hot water into larger pan, filling half full.

    Bake at 350° for 45 minutes or until set. Cover with aluminum foil, and bake 15 more minutes. Remove from oven, and remove dish from water pan.
*You can halve this and make it in a 9x9 pan if you do not have a pan bigger than a 9x13 to put the water bath in.


Wednesday, June 29, 2011

Fearless Icebox Cake


The reason I call this "Fearless" is due to the fact that it is nothing but sugar, cream, butter, and chocolate. So if you dare to make this yummy treat, you cannot be easily scared off. Of course, even if you are easily frightened by such things as fat and calories, this dessert is kept in the freezer, so you can tell yourself that it will last for a long time (aka, despite the fact that you will be sooo tempted, there will be no using "but it's going to go bad if I don't eat it all!" as an excuse.)

Be sure to use crisp chocolate chip cookies and feel free to even add some extra chocolate chips in the whipped cream mixture if you are a choco-holic like me.
Fearless Icebox Cake
Adapted from Ina Garten

2 cups cold heavy cream
8 ounces Italian mascarpone cheese
1/2 cup sugar
1/2 cup coffee liqueur, such as Kahlua
2 tablespoons unsweetened cocoa powder, such as Pernigotti
1 teaspoon instant espresso powder
1 teaspoon pure vanilla extract
3 (8-ounce) packages crispy chocolate chip cookies, such as Tate's Bake Shop, or homemade

In the bowl of an electric mixer fitted with the whisk attachment, combine the heavy cream, mascarpone, sugar, coffee liqueur, cocoa powder, espresso powder, and vanilla. Mix on low speed to combine and then slowly raise the speed, until it forms firm peaks.
To assemble the cake, arrange chocolate chip cookies flat in an 8-inch springform pan, covering the bottom as much as possible. (I break some cookies to fill in the spaces.) Spread a fifth of the mocha whipped cream evenly over the cookies. Place another layer of cookies on top, lying flat and touching, followed by another fifth of the cream. Continue layering cookies and cream until there are 5 layers of each, ending with a layer of cream. Smooth the top, cover with plastic wrap, and refrigerate overnight.
Run a small sharp knife around the outside of the cake and remove the sides of the pan. Sprinkle the top with the chocolate, cut in wedges, and serve cold.


Friday, June 17, 2011

Brownie Cookies


I have a confession, a kind of guilty pleasure. Brownie mix cookies. They are sooo rich and then you add the chocolate chips and they are to-die-for. Believe me, if you are having a chocolate craving, this will more than satisfy. I'm slightly ashamed that it is from a mix, but it is a doctored mix at least, right? They are just so irresistible! Bring them to your next get-together and just wait for the "oooohs and ahhhhs" to begin.

I got home from work today and knew I had to make them. It was one of those long and tedious days when you want to go home even before you walk inside, and then, two hours into your shift, you end up bleeding through (thank goodness for black pants) and have no feminine items on hand. However, when I ate these cookies witch a cold glass of milk from a local farm, my day automatically became perfect. Even with the fact that I chipped my tooth last night and have a slightly exposed nerve, haha. Yay brownie cookies.


Double Chocolate Brownie Cookies!
19.5 oz Brownie Mix
¼ cup butter, melted
4oz cream cheese, softened
1 egg
1 cup semisweet chocolate chips (or more, if you would give you are anything like me and would be tempted to chop off your right hand for chocolate)
Preheat oven to 350F.
Mix all ingredients except chocolate chips in a bowl with a spoon until well blended. Dough will be sticky.
Fold in chocolate chips.
Drop onto ungreased cookie sheets by the tablespoon. Should make 24-30 cookiesBake for 13-15 minutes. Let cool. Enjoy!

Wednesday, June 1, 2011

The Baked Brownie


Mmmm, chocolate. Even better, dark chocolate.

I went on a bit of a baking splurge last Tuesday. I made snicker doodle blondies, blueberry oatmeal bars, homemade bread, and 2 batches of granola. You may think that sounds a bit like overkill, but I assure you, it was well worth it, because just one day later, my oven was taken out of commission due to leaky pipes in the wall to which it is connected.

Brownies seemed like a delicious option and I have been wanting to try this recipe from the Baked bakery in NYC. I assure you, these are the most perfect, soft and fudge brownies that will ever grace your tongue. I love them. A lot.

If you are considering baking a treat to give to a loved one or bring to a group, please consider these! But be warned, despite their richness, there will be no left overs =).
BAKED Dark Chocolate Brownie
From the Baked bakery in NYC

1 ¼ cups all-purpose flour
1 teaspoon salt
2 tablespoons dark unsweetened cocoa powder
11 ounces dark chocolate (60 to 72% cacao), coarsely chopped
1 cup (2 sticks) unsalted butter, cut into 1-inch pieces
1 teaspoon instant espresso powder
1 ½ cups granulated sugar
½ cup firmly packed light brown sugar
5 large eggs, at room temperature
2 teaspoons pure vanilla extract

Preheat the oven to 350 degrees F. Butter the sides and bottom of a 9-by-13-inch baking pan.
In a medium bowl, whisk together the flour, salt, and cocoa powder; set aside.

In a large bowl set over simmering water, stir together chocolate, butter, and instant espresso powder until completely melted and smooth. Keeping the bowl over the water, turn off the heat and add the sugars. Whisk until completely combined. Remove the bowl from the pan and cool to room temperature.
Once the chocolate mixture is cool, add 3 eggs and whisk until combined. Add the remaining two eggs and whisk until combined. Add the vanilla; stir until combined. Be sure not to overbeat the batter at this stage or your brownies will be cakey.

Sprinkle the flour mixture over the chocolate mixture. Using a spatula, fold the flour mixture into the chocolate until just combined. (a bit of the flour mixture should still be visible).

Pour the batter into the prepared pan and smooth the top. Bake, rotating the pan halfway through baking time, in the center of the oven for 27-30 minutes until a toothpick inserted into the center of the brownies comes out with a few moist crumbs clinging to it. Place the pan on a wire rack and let the brownies cool completely. Cut into squares and serve.


Monday, May 16, 2011

Favorite chocolate chip cookies


How did I neglect to post this fantastic recipe before now?

I was in search of something to ship to my new beau (he lives in different state) and thought of these cookies. They made it to him in sad shape, but he said they still tasted great -they are homemade chocolate chip cookies, after all.
These are a chewy, soft cookie, but they are sturdy enough to not fall apart upon first bite. Making each cookie with 3 tablespoons of dough can result in baking in shifts, but they are so good as a jumbo cookie that I cannot put the recipe up in any other way. If you insist on a smaller cookie, 2 tablespoons is as small as you should go.
And yes, they have more coconut than flour, but most people don't even notice the coconut.
Chocolate Chip Cookies
1 cup butter, softened
1 cup sugar
1 cup packed brown sugar
2 eggs
2 teaspoons vanilla extract
2-½ cups all-purpose flour
1 teaspoon baking soda
1 teaspoon baking powder
1 teaspoon salt
2-⅔ cups flaked coconut
1 ½ cup (6 ounces) semi-sweet chocolate chips
5 ounces white candy coating, coarsely chopped, optional
Preheat oven to 350F.
In a large bowl, cream butter and sugars until light and fluffy. Add eggs, one at a time, beating well after each addition. Beat in vanilla.
Combine the flour, baking soda, baking powder and salt; gradually add to the creamed mixture and mix well. Stir in the coconut and chips.
Shape 3 tablespoonfuls of dough into a ball; repeat with remaining dough.
Place balls 3 in. apart on ungreased baking sheets. Bake for 12-18 minutes or until lightly browned. Remove to wire racks to cool.
If you choose to use candy coating:
In a microwave, melt candy coating if desired; stir until smooth. Dip one end of cooled cookies in candy coating so that half of cookie is coated. Allow excess to drip off. Place on waxed paper; let stand until set.

Monday, February 14, 2011

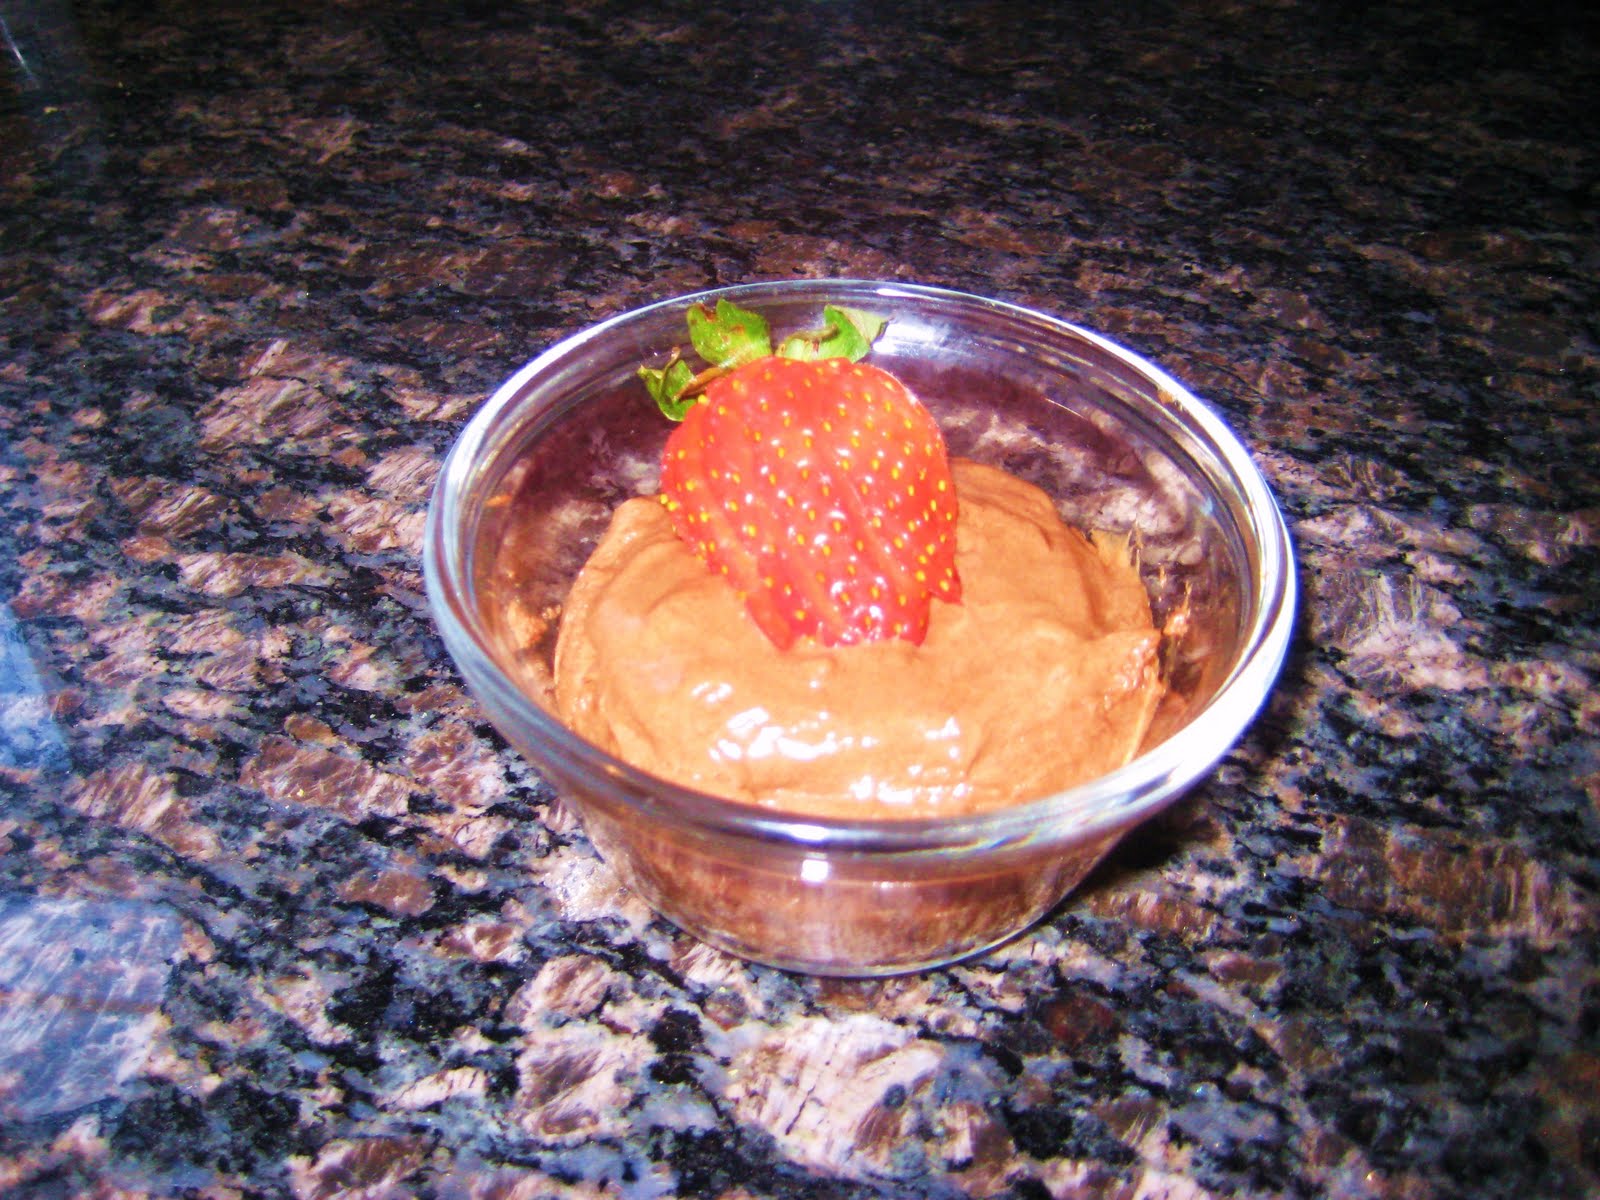
Chocolate Mousse for Two


Nothing is coincidence, which is why it is fate that my heavy whipping cream's expiration date is February 14, 2011. The universe was asking me to make something delicious for Valentine's Day and I, as any good universal citizen would, was happy to answer the call with a chocolate mousse garnished with strawberries.

I know it's weird, but I kind of like Valentine's Day, even when I am single. In fact, the only time I had a horrible V-day was when I was in a relationship. Sometimes I feel like there is too much pressure on people to make February 14 some important, meaningful occasion and all of that just ruins the day. Really, it's just a day to be reminded to slow down, take a break from the busy pace of life, and spend some quality time with someone.

As a single person, I view Valentine's Day as a fun day that gives me an excuse to have some good friends over and eat well. Valentine's Day does not mean gorging myself on cheap chocolate; I'd much rather have a small bit of something decadent, which is why I chose chocolate mousse.

Confession: I am going to the local coffee house, Main and Maple, with a few girls to take advantage of their Valentine's Day Cupcake Decorating Extravaganza and am keeping the mousse all for myself. I have no regrets.


Chocolate Mousse for Two
(Adapted from Tyler Florence's Chocolate Mousse for 6)
*Warning: mousse contains raw eggs
*Also, this makes a small serving, about half a cup. I recommend tripling the recipe if you want 4 large servings.

1/3 cup dark chocolate chips
1 tablespoon unsalted butter
1 large egg, separated
1/6 teaspoon cream of tartar (a scant 1/4 teaspoon)
1 tablespoon+1 teaspoon sugar, plus 2 teaspoons sugar
1/6 cup heavy cream, cold (2 tablespoons, 2 teaspoons)
1/4 teaspoon vanilla extract (peppermint, rum, or almond would also be yummy)
Optional: strawberries or raspberries and a little whip cream for garnish
Put the chocolate and butter in a medium-size microwave bowl and microwave in intervals of 15 seconds, stirring in between, until butter and chocolate have completely melted and combined. Set aside and let cool slightly. Separate egg, reserve the egg white in another bowl, and whisk egg yolk into the chocolate mixture until smooth. Set aside.

Take the bowl with the egg white and beat until foamy. Add the cream of tartar and beat until soft peaks form. Gradually beat in 1 tablespoon+1 teaspoon sugar and continue beating until stiff peaks form.

In a chilled bowl, beat the heavy cream until it begins to thicken a little. Add the remaining 2 teaspoons sugar and the vanilla extract (or w/e extract you want) and continue beating until the cream holds soft peaks.

Now that you've got the three elements prepared, put it all together. Gently fold the egg whites into the chocolate mixture to lighten it. Then, fold in the whipped cream. Take care not over work the mousse or it will be heavy. Divide the mousse between 4 individual glasses. Cover and chill for several hours. Garnish with whipped cream and fruit before serving.

Thursday, February 10, 2011

Graduate School Bars

Another week is here, which means I made another dessert for the Tuesday night get-together.
I have to admit, I made this the day before, on Monday. It was partially because the kids and I were looking for something to do on Monday, since we had already danced for an hour and read some books and making these bars seemed like the perfect activity, but it was also because just 10 minutes prior, I had received some of the best news ever: I think I got into graduate school! Woo!

The reason I think I got into graduate school is because I received an email from the program director asking me if I would be willing to do my MBA after my diplomacy and commerce masters if I won the fellowship for which I have been nominated me. The email did not say I had been accepted, nor have I received an acceptance letter, but I am pretty sure that, if the director of the program emails you to ask if you would be willing to do some courses out of the traditional order so that you could accept a fellowship if you won it, it means you are in, right?

These bars are known as Millionaire's Shortbread and come from Baked in NYC (www.bakednyc.com). Many thanks to my friend, Kathy, for checking out Baked's cookbook from the Lexington library for me so I could drool over the beautiful pictures and actually make the delicious treats.

Essentially, these bars are a homemade twix bar. They are pretty much nothing but sugar, flour, butter, and chocolate, but if you're gonna go for dessert, you just need to throw caution to the wind and try these. Crisp shortbread/cookie foundation, chewy and sweet caramel middle, and thin (but completely satisfying) dark chocolate top. Yum.

The kids enjoyed playing with shortbread dough and pounding it into the 9x13 pan, as well as watching the sweetened condensed milk turn colors and become thick like caramel.

Warning: these are rich and this recipe makes an entire 9x13 pan. Make sure you have lots of friends nearby to help you eat them.


Twix Bars/Baked's Millionaire's Shortbread

SHORTBREAD:

1/2 c sugar
1 1/4 c butter, softened
2 1/2 c AP flour, divided
1 large egg yolk, slightly beaten

CARAMEL:
28 oz sweetened condensed milk

CHOCOLATE:
6oz dark chocolate, coarsely chopped (60% cocoa)
1 t light corn syrup
1/2 c unsalted butter, softened, cut in cubes

Preheat the oven to 350F. Butter the bottom and sides of a 9x13 inch baking pan.
In the bowl of an electric mixer fitted with the paddle, beat the sugar and butter together until blended.

Add 2 cups of flour and beat until well combined. Add the egg yolk and beat for a few second, or until just combined.

Turn the dough out onto a lightly floured work surface. Dust the top of the dough and your hands with a little flour. Use your hands to gently work the dough into a 6x6 inch square. Turn dough and sprinkle the tip with flour as you go. Sprinkle the remaining 1/2 c flour on the surface of dough. Fold dough over and knead until incorporated, then flatten the dough into a rectangle.

Transfer rectangle to prepared pan and press into pan.
Prick dough with fork all over and bake in the center of the oven for 20-22 minutes, until golden brown. Transfer to wire rack and let cool.

Put sweetened condensed milk in a large microwave safe bowl. Cook on 50% for 4 minutes, stirring halfway through. Cook on 30% for 12 to 18 minutes, until very thick and caramel colored, stirring briskly every 2 minutes, until smooth.

Pour caramel filling over cooled shortbread and place the pan in the refrigerator until cool, about two hours.

In a large nonreactive metal bowl, combine the chocolate, corn syrup, and butter. Set the bowl over a saucepan of simmering water and cook, stirring with a rubber spatula, until the mixture is completely smooth. Remove the bowl from the pan and stir for 30 seconds to cool slightly. Pour the mixture over the chilled caramel layer and use an offset spatula to spread it into an even layer.
Put in fridge for one hour, until the glaze hardens.
Remove pan from fridge 30 minutes before serving so as not to crack the chocolate glaze. Cut into squares and serve.
The bars can be stored in fridge, tightly covered, for up to 4 days.

Wednesday, February 2, 2011

Like a Fat Kid Loves Cake

Allow me to introduce to you my new favorite kitchen tool: the 6" offset spatula. He holds up even against tough situations (such as icings that have gotten a tad hard because you left them to read a book to the kids) and cleans up beautifully.

I considered the fact that I could probably save some money and just use a basic knife to ice the cake and spread the filling, but that is just not as fun and I intend to completely master the art of cake decorating and take over the world by charming it with my beautiful cakes. Obviously, an offset spatula is a necessity.


Here is what my off-set spatula and I made -a banana cake with a banana creme filling and chocolate ganache frosting. I brought it to that weekly get-together at Sarah and Nick's and there was none left to bring home =).


There was plenty of left over ganache, so I combined it with two children under the age of 5, and a pinch each of creativity and patience. The result was yummy, though not very pretty, truffles. Mostly because the ganache melted in our hands and then just turned into goop when we covered in melted chocolate.

I learned my lesson: next time I will freeze the ganache for 45-60 minutes after forming into balls, then stick a tooth pick in each one to hold and drizzle the melted chocolate coating over the each one, turning as I go to make a smooth and even coating.

Of course, one must sprinkle them with coconut or almonds to make them pretty and yummy. Mmmm, almonds.


Banana Cake with Banana Filling and Chocolate Ganache Icing
Fyi, before leveling the layers of my cake, I wrap them in cling wrap and place them in the freezer for an hour to make them easier to work with. Also, I just use a large bread knife to level them, nothing special. (Hmmm, a cake wire is yet another thing I need to make my world-conquering cakes).

CAKE:
This is my momma's recipe. She swears my dad would ask for it almost every week when I was little.
And yes, it is from a mix, I know. However much of an abomination a cake mix is, this cake really doesn't take like a cake mix cake.
My mom would top it with homemade cream cheese icing and sprinkle with coconut, but I decided to take a different route.

Make yellow cake mix according to directions, minus 1/4 cup water
add 1 cup bananas mashed
1/8 tsp baking soda
and 1/2 cup nuts if desired
Bake as directed on box

FILLING:
I found this online, not sure who to attribute it to.

7oz Marshmallow Fluff
1 package Banana Instant Jello Pudding Mix
1 cup milk, more if needed
Make the instant pudding according to package directions, but with 1 C milk instead of the full amount required (add more in small increments if needed)
Use a mixer to combine the banana pudding with the marshmallow fluff.
It thickens some once placed in the refrigerator and is a really nice consistency.

ICING/GANACHE:
This recipe can be found in The Cake Bible, which I received from a friend's parents. It's probably from the 1980's and his parents were considering it throwing it away, but gave it to me instead =).

12 oz bittersweet chocolate (60% cocoa; I used Ghirardelli morsels)
1 2/3 cup sour cream
In a double boiler set over hot water or in a microwave on high power, stirring every 10 seconds, melt the chocolate. Remove from the heat and add the sour cream. Stir with a rubber spatula until uniform in color. If the pan feels warm, transfer to a bowl.
Use at a once or store, and when ready to use soften by placing the bowl in a water bath or a microwave for a few seconds, stirring gently.